Exporting Data to Microsoft Excel via a Delimited File
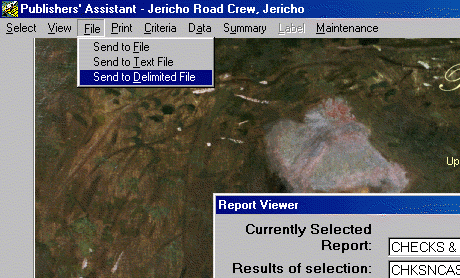
Publishers' Assistant allows you to export data from any report. To do this you simply select File -> "Send to Delimited File" on the report viewer menu. Furthermore, you can tailor the data that you export by altering the report definition. This page documents the procedure for exporting report data to a delimited file, which you can then import into Microsoft Excel or any other program that understands comma-separated values.
Contents
Example using the "Checks and Cash" report
The following procedure uses the "Checks and Cash" report as an example, but you can use any report.
Exporting from Publishers' Assistant
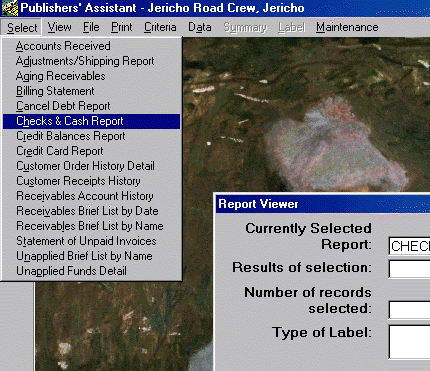
First, select the "Checks and Cash" report from the Receivables Reports menu. Enter your selection criteria, just as if you were going to view or print the report.
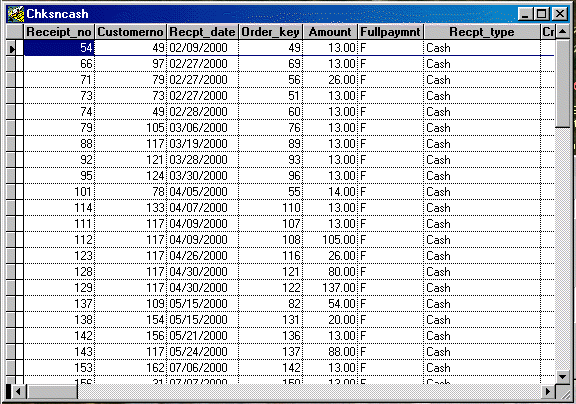
If you want to see the names of the fields that are selected by the report, you can select the "Data" option on the report viewer menu. You will be presented with a browse window of the raw data selected by the report definition. Click on the "X" in the upper right hand corner, or hit "ESC" to exit from the data screen.
If you want to change the data that is to be exported, you can do so by changing the report definition. This step is not necessary if the data selected by a report is close to what you are looking for. However, as you begin to refine your reporting needs, you may want to set up a specific report with only the fields you want to export.
To change a report definition, you select the "Maintenance" option on the Report Viewer menu. You will then be presented with the Report Maintenance screen.
-
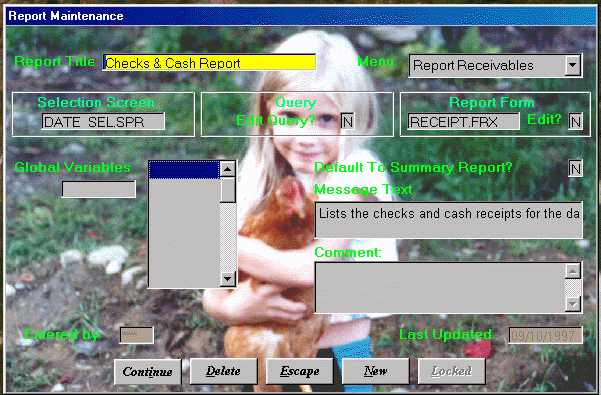
 Note: We strongly recommend that you copy a report definition before making changes. Make changes to the copy, and leave the original report intact. This will keep you from overwriting your changes if you refresh your report definitions. You can copy a report definition by selecting the "Copy" option from the Report Maintenance menu. You'll then be asked to give the new report definition a unique name.
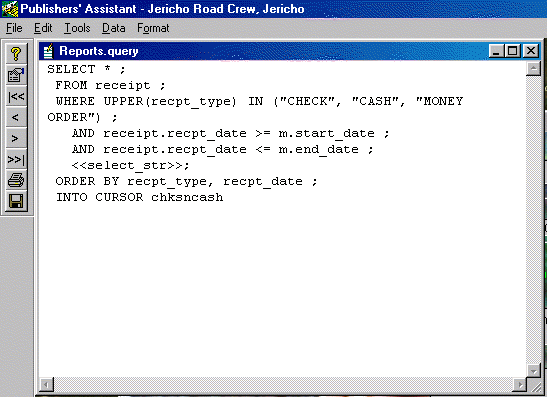
Now, proceed to the "Edit Query?" prompt, and type "Y" in the field. You will be presented with an edit window showing the SQL query for the report. This query is how data is actually gathered for the report. In the example shown here, all fields from the "RECEIPT" table are selected. If you want to output only specific fields, you will have to list those fields individually in the query. Replace the asterisk "*" that follows the "SELECT" keyword with the list of fields separated by commas. You can click on the "Data" menu option to see the currently selected data and field names in the browse screen. You must end each line with a semi-colon (";"). When you have completed your changes, you can save the query by typing "CTRL+W", or by clicking on the "X" in the upper right hand corner.
Once you are sure you have the specific fields that you want to export, select File -> "Send to Delimited File" on the report viewer menu. You will be asked to name the file to be saved. By default, the file will have a ".DLM" extension, and will be saved to the PubAssist program folder. You can navigate to a different location if you wish.
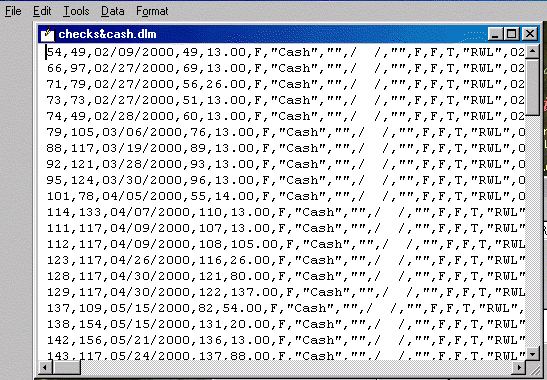
Once you have specified the name and location of the saved file, the delimited file will be saved. You will be presented with a text editing window which allows you to view the contents of the delimited file you have generated. At this point, you can actually edit the contents of this file if you choose to do so. For example, you could decide to add headings for your data in the delimited format. At this point, you should close the delimited file and exit Publishers' Assistant.
Importing into Microsoft Excel
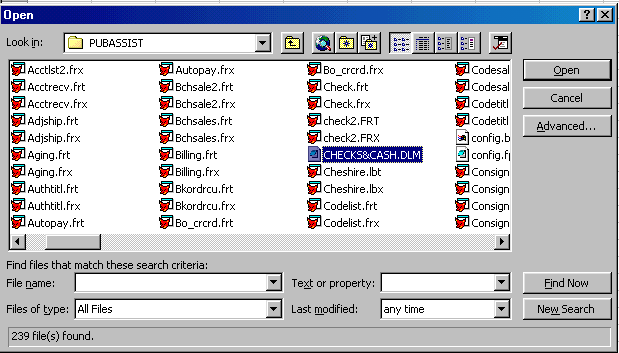
Your next step will be to call up Microsoft Excel. Select the File -> "Open" option from the menu. You should get the familiar Windows "Open File" dialog. You will need to select "All Files" from the "Files of Type" drop down menu on the dialog. In this example, I have selected a previously saved delimited file, "CHECKS&SUM.DLM", but you can enter a new file name. Click "Open" to continue.
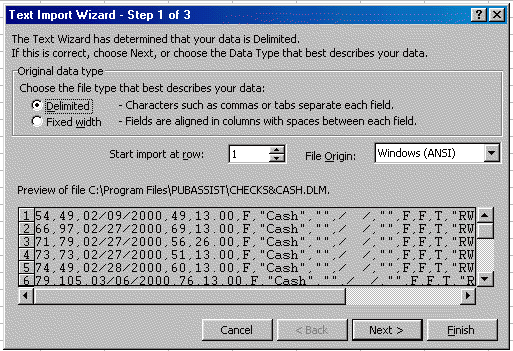
This should initiate the Import Wizard. The first screen of the wizard will ask you what type of file you are importing. Make sure that the "Delimited" option is selected in the "Original Data Type" field. Click "Next" to continue.
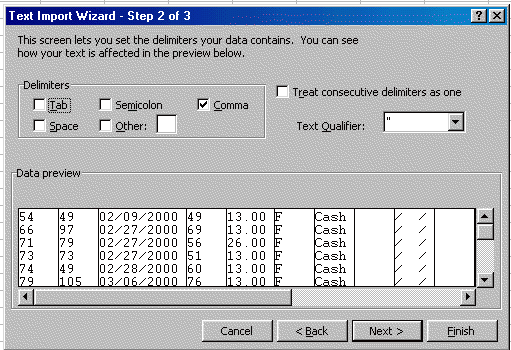
In the second screen of the Import Wizard, you will have an opportunity to select the delimiting character used. Publishers' Assistant currently exports only "comma" delimited files. This screen of the Import Wizard seems to default to TAB delimiters. Remove the check mark next to "Tab" by clicking on it. Add a check mark next to "Comma". Click "Next" to continue.
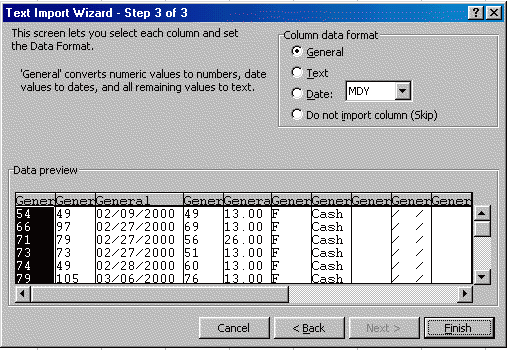
The third screen in the Wizard allows you to set the data format for each specific column that you are importing. Generally, the defaults are fine, but if you wish to change the format for a field, click on the column and then click on the data format desired. Click "Finish" to complete the import process.
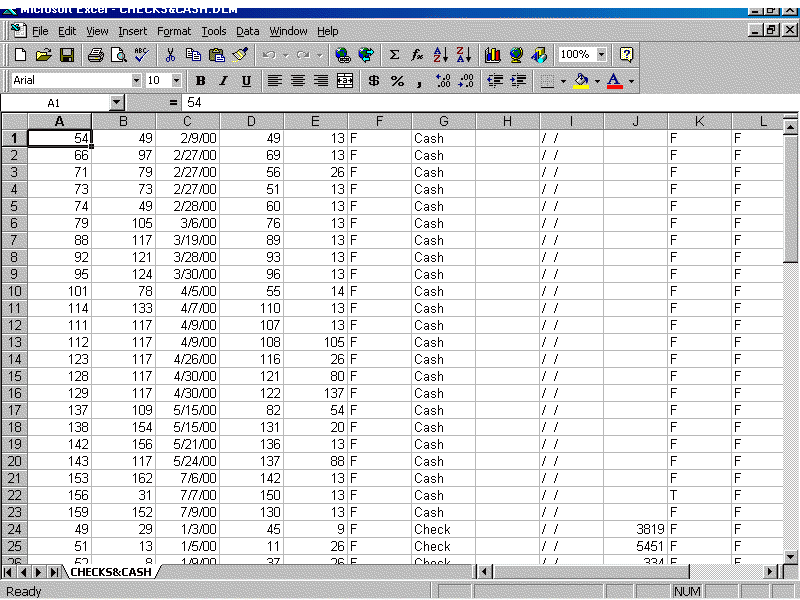
The result should be the data from your Publishers' Assistant report in the spreadsheet you've just created. Each row in the spreadsheet represents a record from the selected data for the report. Each column represents a field from the report data. The data in this spreadsheet can now be manipulated like any other spreadsheet data. It can also be copied and pasted into another spreadsheet where you have prepared formulas to derive the information you are looking for.




 Follow conversations with Ron on SPANNet.org.
 Proud participant in Microsoft Visual FoxPro Forum at Tek-Tips