How to Export Credit Card Charges
There are several software packages available which allow you to submit credit card charges to for processing and approval. Two fairly popular programs are ICVerify and PC Authorize. This article will explain how you can export credit card charges from Publishers' Assistant and import them into ICVerify or PC Authorize. Given that these two programs work in a similar fashion, other credit card processing programs are likely to do the same.
Contents
Exporting from Publishers' Assistant
This procedure makes use of a Publishers' Assistant report entitled, "Export Credit Card Charges." This report is located in the Receivables report menu. If you do not have this report, you may obtain it from the Downloads page of the Publishers' Assistant web site. Like all Publishers' Assistant reports, you can modify this report definition to tailor the output to meet your exact needs.
-
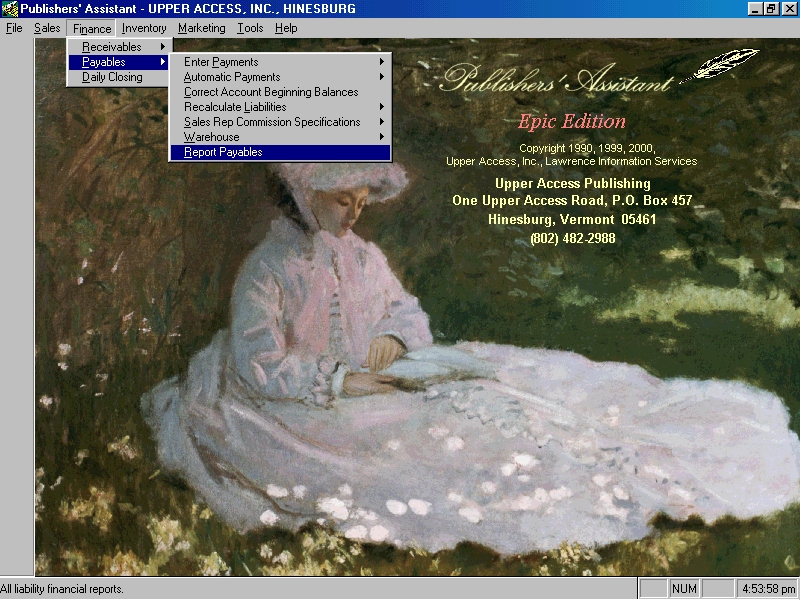
Once you have installed the "Export Credit Card Charges" report, you can call it up from the "Finance", "Receivables", "Report Receivables" option on the menu.
-
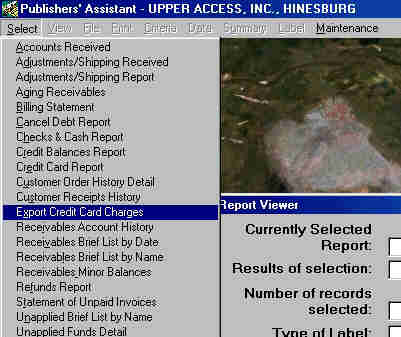
Next, select the "Export Credit Card Charges" report from the Report Receivables menu.
-
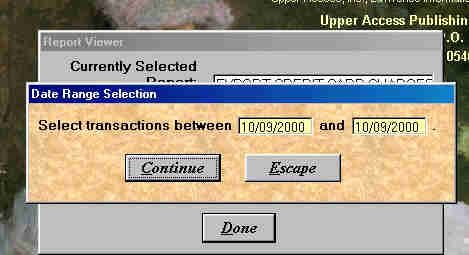
Enter the date range for the transactions you would like to export for processing. Click on the "Continue" button to begin the data selection process. Once your data is selected, the report viewer will show you how many records were selected.
-
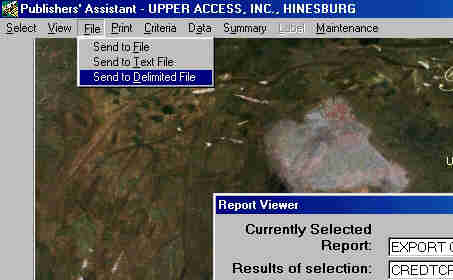
At this point, you can view, file, or print the results of the report. To export the data to a delimited file, select "Send to Delimited File" on the File menu.
-
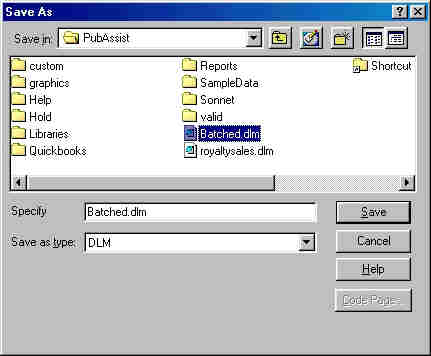
You will be asked to supply a name for the delimited file. Navigate to a desired location and give the file a name.
-
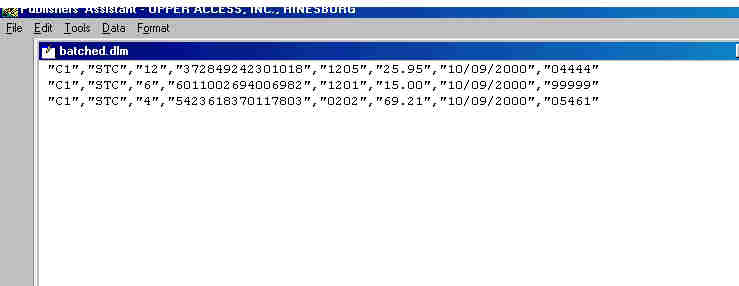
The results should look something like this. Type "CTRL+W" or click on the "X" in the upper right hand corner of the edit window to close the delimited file edit window.
Importing into ICVerify
-
Transactions imported into ICVerify are gathered into an "Off-line Group" for processing in batch. This seems to be an entity specifically designed to handle imported data. To begin the process, call up ICVerify and select "Import" from the File menu.

-
The specific fields that you are importing must be selected, in the order that they appear in the import file. Select the fields that appear in this screen in order to accept the standard fields produced by the "Export Credit Card Data" report. Note that if this set of fields does not meet your needs, you can modify the "Export Credit Card Data" report to save the particular fields that you need.
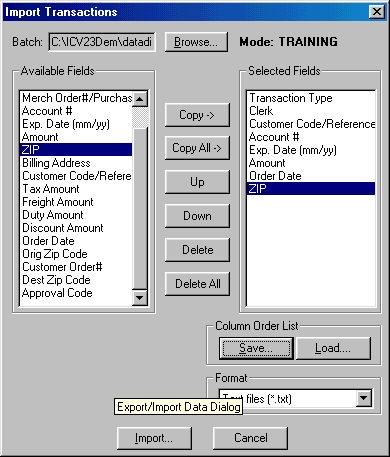
- Once you have the correct fields listed, you can save the collection to an ICVerify Import file by clicking on the "Save..." button. Then the next you want to import data, simply click on the "Load..." button and select the import file you saved. The list of fields you selected above will be restored to the import screen.
-
Now, click on the "Import" button and navigate to the export file that you saved from Publishers' Assistant. Note that Publishers' Assistant exports delimited files to a file with a ".DLM" extension. Enter "*.DLM" in the file entry on the Open File dialog and it will display only ".DLM" files as opposed to ".TXT" files. Once you find your exported data, click on the "Open" button.

-
Assuming that your field selection is correct, you should receive a message box telling you how many transactions were successfully imported.

-
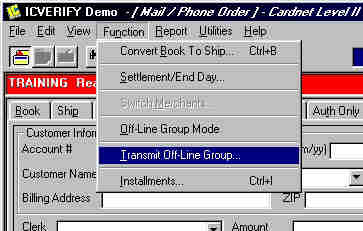
The next step is to submit the imported transactions for processing. As mentioned above, ICVerify imports transactions into an "Off-line Group". Aside from the success message above, there doesn't seem to be any other visible sign of the imported transactions on the screen. The transactions don't seem to show up until they are submitted as a group for processing. To do so, select "Transmit Off-line Group" on the "Function" menu.
-
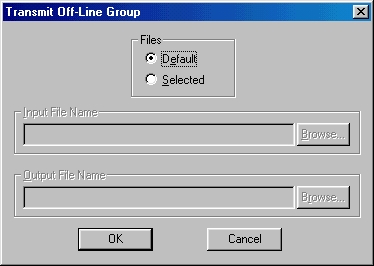
An interim screen asks for the location of the file holding the off-line group records. Since we are using the default file, simply click on "OK" to continue.
-
After the credit card transactions are submitted, you'll be able to view them in the main window.

Importing into PCAuthorize
-
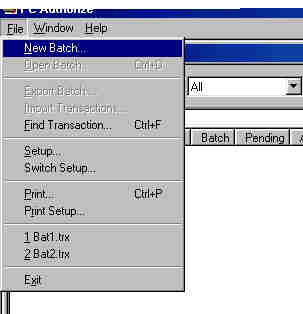
The process for importing data to PC Authorize is very similar. Instead of using an "Off-line Group," PC Authorize allows you to import data to the current "batch." Start PC Authorize and open a new batch, by selecting "New Batch" from the "File" menu.
-
Two more windows will be opened. The top window is a data entry screen for transactions you want to enter by hand. Since we are not manually entering any transactions, close this window by clicking on the "X" in the upper right-hand corner. The second window, which is empty will be revealed. This window will eventually display the imported transactions.
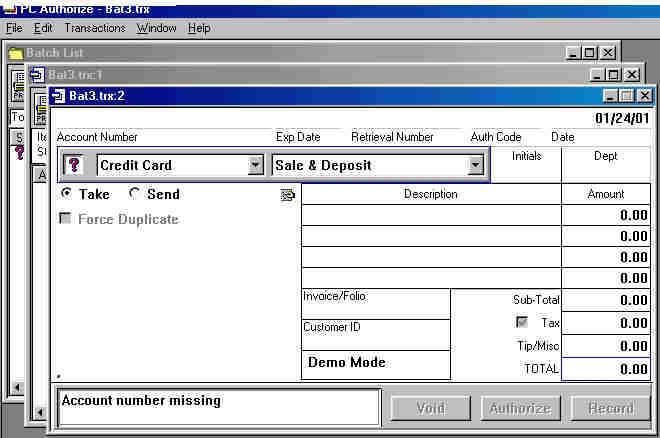
-
Next, begin the import process by selecting "Import Transactions..." from the "File" menu.
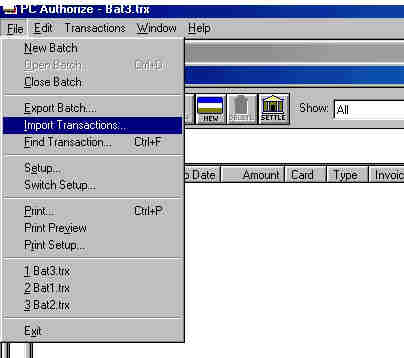
-
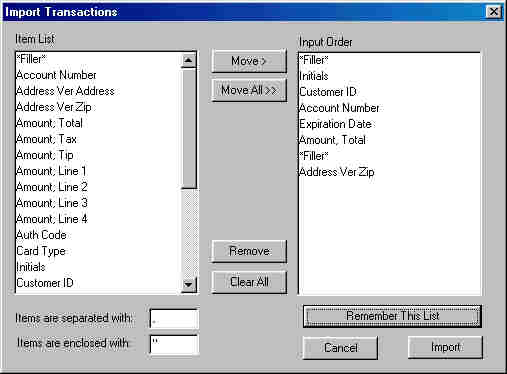
You will be presented with an import screen very much like the one that appears in ICVerify. The screen will allow you to select from the list of fields on the left into a collection on the right. This collection identifies the specific fields being imported. Note that the first field in our delimited file contains "C1". This is an identifier that is used by ICVerify. It is not used by PC Authorize, so the "*filler*" option is selected to cause that field to be ignored. The order date didn't seem to be available on the list of fields, so I made a "*filler*" entry for that field as well. Click on "Remember this List" to save your field selections. Then click on "Import" to begin the import process.
-
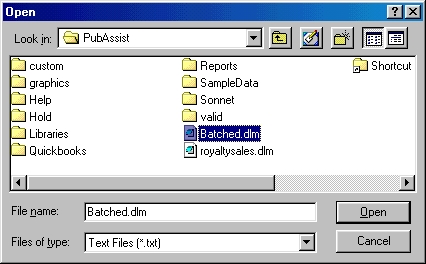
You will be asked to select the file to be imported. Navigate to the export file that you saved from Publishers' Assistant. Note that Publishers' Assistant exports delimited files to a file with a ".DLM" extension. Enter "*.DLM" in the file entry on the Open File dialog and it will display only ".DLM" files as opposed to ".TXT" files. Once you find your exported data, click on the "Open" button.
-
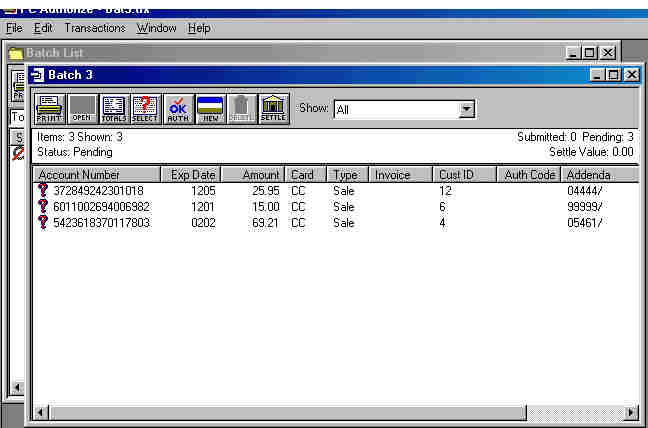
Your credit card transactions will be imported and displayed in the batch window. Question marks appear next to each transaction because they have not yet been submitted for processing. These transactions are now available for editing or submission like any other transaction logged into PC Authorize.
Other Considerations
In my testing, I was using demo versions of ICVerify and PC Authorize. I don't have a merchant account, so I couldn't actually submit real charges for processing. However, both demos seemed to perform realistic checks on the transactions I submitted. Both rejected the same transaction when I submitted them for processing. You may find that some tweaking is necessary in order for this process to work exactly as you would like, but this testing was enough to tell us that exporting data to these applications seems to be a pretty straight forward process.




 Follow conversations with Ron on SPANNet.org.
 Proud participant in Microsoft Visual FoxPro Forum at Tek-Tips